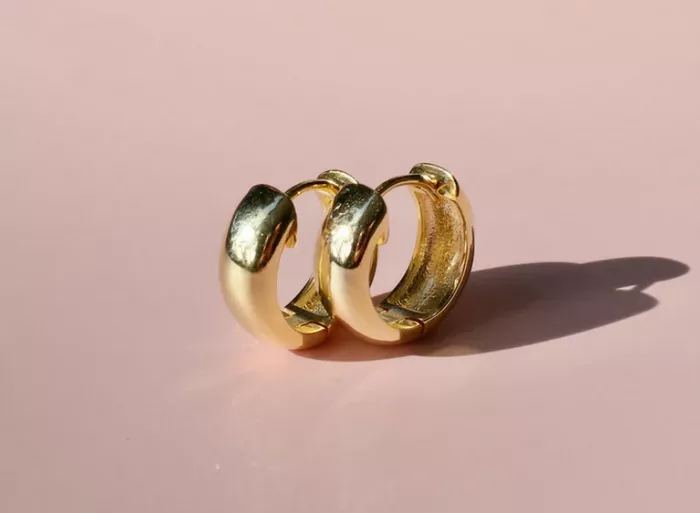
Hinged hoop earrings are a popular choice for their elegance and versatility. They can be dressed up for formal occasions or worn casually. Making your own hinged hoop earrings can be a rewarding experience. This article will guide you through the process of creating beautiful hinged hoop earrings, from selecting materials to completing the final product.
Understanding Hinged Hoop Earrings
Hinged hoop earrings are circular earrings that have a hinge mechanism. This allows the earrings to open and close easily. The design gives a secure fit and makes them comfortable to wear. They can be made in various sizes and styles. You can customize them to fit your personal taste.
Hinged hoop earrings typically consist of a circular hoop and a hinge that connects to a clasp. The design can be simple or embellished with beads, stones, or other decorative elements. Understanding the basic components is essential before you start making your earrings.
Materials Needed
Before you begin, gather the necessary materials. Here is a list of items you will need:
Wire: Choose a durable metal wire. Sterling silver or gold-filled wire works well. Use 20 or 22 gauge for sturdiness.
Hinges: You can purchase pre-made hinge findings or create your own. If making your own, use small jump rings.
Earring backs: Choose the type that fits your style. You can use standard butterfly backs or lever backs.
Round-nose pliers: These will help you create loops and bends in the wire.
Chain-nose pliers: Use these for opening and closing jump rings.
Wire cutters: You will need these to cut your wire to the desired length.
Beads or embellishments: If you want to decorate your hoops, select beads that complement your design.
File or sandpaper: Use this to smooth the ends of the wire.
Jewelry adhesive (optional): This can help secure embellishments if needed.
Designing Your Earrings
Before you start crafting, it is essential to design your earrings. Think about the size, shape, and style you want.
Size: Decide how big you want your hoops. Standard sizes range from small (1 inch) to large (3 inches or more). Larger hoops will require more wire and will be heavier.
Shape: While traditional hoops are circular, you can experiment with different shapes, such as oval or square.
Style: Consider how you want to embellish your earrings. You can add beads, gemstones, or charms. Keep your overall style in mind.
Once you have a design, sketch it out if needed. This will help guide you during the making process.
Cutting the Wire
Once your design is ready, it’s time to cut the wire. Measure the length of wire you need for each hoop.
Measure: For a standard hoop, measure about 3-4 inches of wire. Adjust according to the size you want.
Cut: Use your wire cutters to cut the wire. Ensure the ends are clean and straight.
Smooth: Use a file or sandpaper to smooth any sharp edges. This will prevent discomfort when wearing the earrings.
Shaping the Hoops
Now, it’s time to shape the wire into hoops.
Create the hoop: Use round-nose pliers to create a loop at one end of the wire. Hold the wire with the pliers and wrap it around to form a circle.
Complete the circle: Bring the other end of the wire around to meet the loop.
Secure the hoop: Use the pliers to twist the two ends together. Make sure it is tight and secure.
Trim excess wire: If there is any extra wire, trim it to avoid bulk.
Adding the Hinge
Next, you will add the hinge mechanism to your earrings.
Attach the hinge: If using pre-made hinges, simply open the jump ring and slide it through the hole in the hinge.
Connect the hoop: Attach the other end of the jump ring to the hoop you created. Use your chain-nose pliers to close the jump ring securely.
Make a custom hinge (optional): If you prefer to make your own hinge, create a small loop with a piece of wire. Attach it to the hoop and ensure it is secured.
Decorating the Hoops
This step allows you to add your personal touch.
Choose your embellishments: Select beads, stones, or charms that complement your design.
Attach embellishments: Use the jump rings to attach your chosen decorations to the hoop. Ensure they are spaced evenly for balance.
Secure with adhesive (optional): If you want to ensure your embellishments stay in place, consider using a small amount of jewelry adhesive.
Attaching the Earring Backs
Once your hoops are complete and decorated, you can attach the earring backs.
Choose the backing: Select the type of earring backs you want to use. Butterfly backs are common, but lever backs provide additional security.
Attach the backs: If using butterfly backs, open them and slide them onto the end of the hoop. If using lever backs, attach them to the hoop and ensure they are secure.
Test the closure: Make sure the backs close tightly. This will prevent the earrings from falling off when worn.
Final Touches
Now that your earrings are nearly complete, it’s time for the final touches.
Inspect the earrings: Check for any sharp edges or loose components. Make sure everything is secure and smooth.
Polish the earrings: If desired, use a jewelry polishing cloth to give your earrings a shiny finish.
Store properly: Keep your earrings in a safe place to avoid damage. A jewelry box or pouch works well.
See also: Why Are Hoop Earrings Cultural Appropriation?
Conclusion
Making hinged hoop earrings is a fulfilling project that allows for creativity and personalization. By following the steps outlined above, you can create beautiful earrings that reflect your style.
Experiment with different designs, sizes, and embellishments to make each pair unique. With practice, you will improve your skills and create stunning pieces of jewelry.
Whether for yourself or as a gift, handmade hinged hoop earrings are sure to impress. Enjoy the process of creating your own jewelry and wear your creations with pride.
Related topics:

