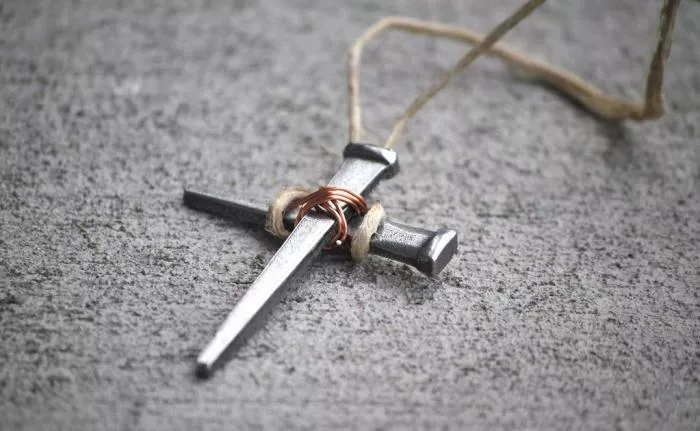
Creating a homemade cross necklace can be a fulfilling and creative project. Whether for personal use or as a thoughtful gift, a handmade necklace carries a unique touch. This guide will walk you through the materials needed, the steps to create your necklace, and some tips for customization. Let’s get started!
Materials Needed
To make your cross necklace, you will need several basic materials. Here is a list of what you will require:
Cross Pendant: You can choose a pre-made cross pendant or make one yourself using materials like wood, clay, or metal.
Necklace Chain: Select a chain that suits your style. Options include silver, gold, leather, or hemp cord.
Jump Rings: These small metal rings help attach the pendant to the chain.
Clasp: This is needed to secure the necklace around your neck. Lobster clasps are a popular choice.
Pliers: Use pliers to open and close the jump rings.
Wire (optional): If you want to make a custom pendant, you might need wire.
Paint or Markers (optional): These can be used to decorate your pendant.
Sandpaper (optional): If you are working with wood or metal, sandpaper will help smooth out any rough edges.
Designing Your Pendant
Before starting, consider how you want your cross pendant to look. If you choose to create one from scratch, you can make it from various materials. Here are some ideas:
Wooden Cross
To make a wooden cross pendant, follow these steps:
Select Wood: Choose a piece of lightweight wood. Balsa or pine works well.
Cut the Wood: Using a small saw, cut the wood into a cross shape. Aim for a size that will fit comfortably on your chain.
Sand the Edges: Use sandpaper to smooth out the edges and corners. This will help prevent splinters.
Decorate (optional): If you want to add color, use paint or markers. You can also carve designs into the wood.
Clay Cross
If you prefer clay, here’s how to create a clay cross pendant:
Choose the Clay: Use polymer clay, which is easy to mold and hardens when baked.
Shape the Cross: Roll the clay into a long cylinder. Flatten it and shape it into a cross.
Add Texture: Use tools or your fingers to add texture or designs to the surface.
Bake the Clay: Follow the instructions on the package to bake the clay until it hardens.
Metal Cross
For a metal cross, you can use thin sheets of metal or wire:
Cut the Metal: If using sheet metal, cut it into a cross shape.
Shape with Wire: If using wire, bend it into a cross shape, making sure to twist the ends together to secure the shape.
Smooth Edges: If you are using metal sheets, use sandpaper to smooth out sharp edges.
Assembling the Necklace
Once your pendant is ready, it’s time to assemble your necklace.
Attach Jump Rings: Use pliers to open a jump ring. Slide it through the top hole of your pendant.
Close the Jump Ring: Use the pliers to close the jump ring securely.
Add the Chain: Thread the jump ring onto your chosen chain. Make sure the pendant is centered.
Attach the Clasp: At one end of the chain, attach a clasp using another jump ring. At the opposite end, you can attach another jump ring or simply knot the chain if using cord.
Customizing Your Necklace
One of the best parts of making your necklace is the ability to customize it. Here are some ideas for personalization:
Add Beads or Charms
Consider adding beads or charms to your necklace. This can enhance the overall look and add a personal touch.
Select Your Beads: Choose beads that complement your pendant. You can use wooden, glass, or gemstone beads.
Plan the Design: Decide how you want to space the beads along the chain.
String the Beads: Use a needle or wire to thread the beads onto the chain.
Choose a Unique Chain
The chain you select can greatly affect the style of your necklace. Think about:
Length: Do you want a choker, a standard length, or a long chain?
Material: Consider the look and feel of different materials. Metal chains give a classic vibe, while leather can look rustic.
Engraving
If you have the tools, consider engraving a special date or initials onto the cross pendant. This adds an extra layer of sentiment.
Caring for Your Necklace
Once you have completed your cross necklace, it’s essential to take care of it. Proper maintenance will ensure it lasts for years to come.
Store Properly: Keep your necklace in a soft pouch or jewelry box to prevent scratches and tangling.
Clean Regularly: Depending on the materials used, clean your necklace gently with a soft cloth. Avoid harsh chemicals.
Avoid Excess Moisture: If your necklace has metal parts, try to keep it away from water. Moisture can cause tarnishing.
Inspect for Damage: Regularly check the jump rings and clasp for wear. Replace any damaged components promptly.
Conclusion
Making a homemade cross necklace is a rewarding experience that allows for creativity and personalization. By following the steps outlined above, you can craft a unique piece that holds special meaning. Whether you wear it yourself or give it as a gift, your homemade necklace will be cherished for years to come.
Now that you have the knowledge to create your own cross necklace, gather your materials and start crafting! Enjoy the process and let your creativity shine.
Related topics:

