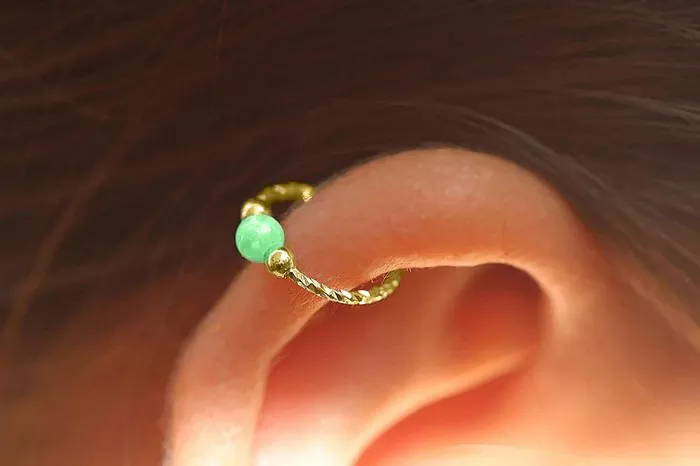
Cartilage piercings, particularly those adorned with hoop earrings, require delicate handling and specific techniques when it comes to removal. Whether you’re a first-time wearer or a seasoned jewelry enthusiast, knowing the right steps to safely remove hoop earrings from cartilage is crucial to avoid discomfort, irritation, or potential damage to the piercing itself. This comprehensive guide aims to equip you with the knowledge and skills necessary to perform this task with confidence and ease.
Understanding Cartilage Piercings and Hoop Earrings
Before delving into the removal process, it’s essential to understand the anatomy of cartilage piercings and the characteristics of hoop earrings. Cartilage piercings differ from lobe piercings in that they typically take longer to heal and are more prone to irritation due to their location and the type of tissue involved. Hoop earrings, characterized by their circular shape, can vary in diameter, thickness, and closure mechanisms, all of which impact how they are removed safely.
Preparation: What You Need
Gathering the right tools and preparing the environment are crucial steps before attempting to remove a hoop earring from a cartilage piercing. Here are the essential items you’ll need:
Clean Hands: Wash your hands thoroughly with soap and water to prevent introducing bacteria to the piercing.
Sterile Cotton Balls or Pads: These will be used to clean the area around the piercing if needed.
Sterile Saline Solution or Piercing Solution: This helps to clean the piercing and soften any crust that may have formed around the jewelry.
Small Mirror: Use a mirror to get a clear view of the piercing site if you’re removing the earring yourself.
Piercing-Safe Lubricant: Optional but useful for easing the removal process, especially if the hoop earring is snug.
Light Source: Adequate lighting will ensure you can see clearly during the removal process.
Step-by-Step Guide to Removing Hoop Earrings from Cartilage
Step 1: Choose the Right Time and Place
Select a well-lit, clean area where you can comfortably work without distractions. Avoid removing earrings in places where you might drop or lose the earring, such as over a sink drain.
Step 2: Cleanse the Area
If there is any crust or debris around the piercing, gently cleanse the area with a sterile saline solution or piercing solution. Use a cotton ball or pad to dab around the earring to ensure the area is clean.
Step 3: Check the Closure Mechanism
Examine the hoop earring to determine the type of closure it has:
Hinged Hoops: These have a small hinge mechanism that allows one side of the hoop to open. They are typically secured with a tiny clasp that needs to be released.
Continuous Hoops: These are seamless and need to be gently manipulated to create an opening large enough to slide out of the piercing.
See Also: What Is Open Hoop Earrings: Things You Need To Know
Step 4: Loosen the Earring (if necessary)
If the hoop earring feels snug or tight, use a piercing-safe lubricant to gently lubricate the area around the piercing. This can help loosen the earring and make it easier to remove without causing discomfort.
Step 5: Open the Hoop
Depending on the type of closure:
For Hinged Hoops: Locate the small clasp or hinge mechanism and carefully open it using your fingers or a pair of sterilized tweezers. Be gentle to avoid bending the hoop or causing injury to the piercing.
For Continuous Hoops: Hold the earring firmly with one hand and gently twist or bend the ends away from each other to create a small opening. Take care not to bend the hoop too much, as this can distort its shape.
Step 6: Remove the Earring
Once you have opened the hoop sufficiently:
Hinged Hoops: Slide the earring out of the piercing by gently pulling it away from the earlobe or cartilage.
Continuous Hoops: Carefully maneuver the hoop out of the piercing by twisting or rotating it gently until it slides out.
Step 7: Cleanse Again (optional)
After removing the earring, cleanse the piercing site again with a sterile saline solution or piercing solution to ensure any residue or lubricant is removed. This helps maintain the cleanliness of the piercing and reduces the risk of infection.
Step 8: Inspect the Earring and Piercing
Take a moment to inspect both the hoop earring and the piercing itself. Look for any signs of damage, irritation, or infection. If you notice any redness, swelling, or discharge, consult with a professional piercer or healthcare provider for guidance.
Tips for Success
Be Patient and Gentle: Rushing or being forceful can cause unnecessary pain or damage to the piercing.
Ask for Assistance if Needed: If you’re having difficulty removing the earring, don’t hesitate to seek help from a professional piercer.
Keep Your Tools and Environment Clean: Maintaining cleanliness reduces the risk of introducing bacteria to the piercing site.
Troubleshooting Common Issues
Issue: Earring Won’t Open
Solution: Try using sterilized tweezers to gently pry open the hinge or use lubricant to ease the closure.
Issue: Earring Feels Stuck
Solution: Avoid forcing the earring. Use lubricant and gently maneuver the hoop until it loosens.
Issue: Pain or Bleeding
Solution: Stop immediately and seek guidance from a professional piercer or healthcare provider.
Conclusion
Removing hoop earrings from cartilage piercings requires careful attention and a gentle touch. By following the steps outlined in this guide, you can safely remove your hoop earrings without causing discomfort or compromising the integrity of your piercing. Remember to always prioritize cleanliness, patience, and if needed, seek assistance from a professional piercer for a smooth and successful removal process.

